Wicked well done webcode.
Would I be able to buy them off you that would be great? Or can you tell me what bits i need to make my own.
Cheers
Chris
Megane Facelift Rear light Cluster Part No's Here
Moderators: q292u, Ray, AndyAdmin, Stranger
-
andysmiff1
- Learner Driver
- Posts: 65
- Joined: Sun Jul 31, 2005 5:49 pm
- Location: Merley, Nr Wimborne, Dorset


FACELIFT REAR LIGHT FITTING
Hi,
I have just fitted a set of 'Facelift' rear light clusters to my 53 plate Megane 3 door, I was never keen on the original lights as they're dull and look dated. Im delighted with the outcome as the rear has now been completely transformed and the lines now appear so prominent.
The outlay was £75inc for the pair, plus about £3 for some mini spade connectors and some suitable loom wire. Overall a very inexpensive and effective cosmetic upgrade.
Unfortunately and as previously stated, these units will NOT fit the existing connectors and the looms are not available from Renault. (
(
Hence you will need to remove the original connectors and create soldered connections or spades.
Im no auto electrician but completed the job in around 4 hours, using a 12v mains tester and common sense.
I can now pass on the correct loom colour code and pin number info to anyone who wishes to attempt the upgrade. Which should take approximately 2 hours.
I dont think I can post pictures as im a brand new member. But if a moderator or experienced member would like me to send a diagram so they can post it here, then please let me know.
Great site guys. ;o)
Regards
Paul57675 veracitycarl@hotmail.com
I have just fitted a set of 'Facelift' rear light clusters to my 53 plate Megane 3 door, I was never keen on the original lights as they're dull and look dated. Im delighted with the outcome as the rear has now been completely transformed and the lines now appear so prominent.
The outlay was £75inc for the pair, plus about £3 for some mini spade connectors and some suitable loom wire. Overall a very inexpensive and effective cosmetic upgrade.
Unfortunately and as previously stated, these units will NOT fit the existing connectors and the looms are not available from Renault.
Hence you will need to remove the original connectors and create soldered connections or spades.
Im no auto electrician but completed the job in around 4 hours, using a 12v mains tester and common sense.
I can now pass on the correct loom colour code and pin number info to anyone who wishes to attempt the upgrade. Which should take approximately 2 hours.
I dont think I can post pictures as im a brand new member. But if a moderator or experienced member would like me to send a diagram so they can post it here, then please let me know.
Great site guys. ;o)
Regards
Paul57675 veracitycarl@hotmail.com
hey PAUL5765,
can you send me the diagram I have the rear lights but not the plugs was waiting for webcode to help out. But if you could send me some pics/diagram that would be great here is my email:
Christos_1982@hotmail.com
Cheers
Chris
can you send me the diagram I have the rear lights but not the plugs was waiting for webcode to help out. But if you could send me some pics/diagram that would be great here is my email:
Christos_1982@hotmail.com
Cheers
Chris
-
Ray

- Site Admin
- Posts: 3845
- Joined: Mon Mar 21, 2005 1:11 am
- Currently Drives:: 2005 Megane Privilege - Now Sold
- Location: Hong Kong
Ray wrote:feel free to send it to me and i'll host the pic... ray-lee@msn.com
Hi Ray and Christos,
I will definately do a sketch and send it to Ray as a jpeg for him to upload here.
Unfortunately. I will be working away, on site in London (I'm from West Mids) from 5am tommorrow until Friday pm.
I will send the info as soon as I get back, so watch this space.
Sorry about the delay.
Regards
Paul
I will definately do a sketch and send it to Ray as a jpeg for him to upload here.
Unfortunately. I will be working away, on site in London (I'm from West Mids) from 5am tommorrow until Friday pm.
I will send the info as soon as I get back, so watch this space.
Sorry about the delay.
Regards
Paul

Rear lights from 06 Megane
Hi, just purchased the new lights today at the price webcode mentioned (thanks webcode).
Will fit them this week and post a wiring diagram if nobody else beats me to it!!!
Will fit them this week and post a wiring diagram if nobody else beats me to it!!!
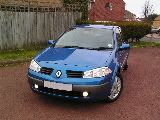
Renault Megane 2.0vvt Dynamique 3Dr 2003/03, Pearlescent Silver, 17" Nervasport alloys and Comfort Pack. Half leather seats and face-lifted rear lights. Valeo flat wipers.
FACELIFT REAR LIGHT FITTING
Hi,
Here are the wiring details for the facelift rear light clusters as promised.
You will need a soldering iron, some suitable wire, insulation tape and a 12v mains tester (the flashing bulb type is ideal.) Plus some spare 7.5, 10 and 15 amp fuses, just in case.
I have used mini spades for the lead / pin connections but will soon hard wire (solder) the leads to the pins to achieve a 100% secure connection.
As previously mentioned. I am not a 'auto electrician' and can only pass on details of a successful fitment to my vehicle. Hopefully the loom wire colours will be the same on your model type / spec / year etc. Should this not be the case I cannot assist further, sorry.
Here are the details.
INITIAL POINTS..
* The pin numbers shown represent the numbers on the NEW light units.
* Fog light connections are available on the offside only.
* There are several wires of exact colour (white black dots) so be sure to cut the fog light loom and main loom wires at different lengths in case you need to back track.
* Make sure that EVERY connection is insulated with electrical tape.
............................................OFFSIDE................................................
Fog Loom
Wire Colour...
WHITE BLACK DOTS = indicator or fog live (confirm with 12v tester. Turn on hazard lights, bulb will flash)
WHITE BLACK DOTS = indicator or fog live. CENTRE BULB PIN. IN BULB HOLDER.
BLACK = Earth Fog OUTER BODY PIN. IN BULB HOLDER
Main Loom
Wire Colour
BROWN/ORANGE = PIN 5
BLUE = PIN 4
BLACK = PIN 3 (Main Loom Earth)
WHITE BLACK DOTS = PIN 2
WHITE BLACK DOTS = PIN 1 (This is the indicator live, originally from FOG LOOM, described above.)
............................................NEARSIDE...............................................
2 Pin Loom
Wire Colour...
WHITE BLACK DOTS = indicator live (confirm with 12v tester. Turn on hazard lights, bulb will flash)
BLACK = Not connected
Main Loom
Wire Colour
WHITE BLACK DOTS = indicator live (originally from 2 pin loom described above) = PIN 5
WHITE BLACK DOTS = PIN 4
BLACK = PIN 3 (Main Loom Earth)
ORANGE = PIN 2
BLUE = PIN 1
Thereafter. I hope this helps and good luck with your improved ASS.
Regards
PAUL5765 (I never thought i'd own a Renault.)
P.S. Christos. I have sent you PM
P.P.S. Ray, I will send some pics. Thanks.


.JPG)

.JPG)
Who is online
Users browsing this forum: No registered users and 13 guests